I painted my kitchen chairs green last weekend and I’m LOVING the way they pop now against my new white tulip table! I completely forgot to take close up before pics of the chairs and didn’t even think of doing a “how to” on them but I will give you the rundown on how I painted, distressed, stained them right now for those of you who might be wondering. This is my own made up way to distress and paint wooden furniture. There are tons of great sites out there with lots of professionals that really know what they’re doing but I’m impatient and cheap so I do things the short and sweet way. These chairs were previously painted cream and distressed and stained. To get them green I simply bought a spray primer (in grey to save on top coats), and green spray paint. The paint I used is from Rust-Oleum and is called “Fern”. It came in a “Gloss Protective Enamel” which worked great and will be extra durable to little hands and wipe downs. I also bought a stain that has a built in polyeurothane coating. I used Minwax PolyShades in Antique Walnut. Staining over a painted piece of wood furniture gives an antique feel and gives the piece real character. I wanted my old farmhouse style chairs to look old and worn because I thought the flat gloss paint color would look odd on that style of chair. Anyway, heres what I did:
1. I sanded the chairs slightly with a medium grit sandpaper. Just to give them some tooth for the primer to hold on to.
2. Then I sprayed a coat of the grey primer all over the chairs. I wasn’t super concerned if they weren’t completely covered in opaque primer.
3. Once the primer was dry, I sprayed the chairs with the green enamel spray paint. If I weren’t doing these for myself I would’ve done several light coats until the chairs were covered. But I am impatient and didn’t care about PERFECTION so I just slapped it on thick in one coat, being careful not to create drips.
4. I let the freshly painted chairs dry overnight.
5. The next day I took my sandpaper and lightly sanded some of the edges and divets and other areas to give it that distressed, worn look. Some of the areas got sanded down to the original wood, others got sanded down to the cream paint color that was on them before. My chairs were already “beat up” from when I had distressed and painted them the first time. If you want a real distressed look, feel free to take an awl, hammers, rocks, chisels, etc. to your piece to distressed it and make it look worn and old. Then, when you sand, pay special attention to all those little areas and make them come out by sanding them back a bit.
6. After they were all sanded and distressed, I wiped them down really well with a damp cloth. Then I got my stain out and started applying it one area at a time with a paper towel. This is where you gotta move kinda quick. I just dip my towel into the stain and start rubbing it on in the direction of the woodgrain (or where the woodgrain would go if you hadn’t painted it). Rub it on and keep rubbing over it until you have applied the right amount. It will start to dry and get tacky if you rub too much though so you might want to practice the look you’re going for on a scrap piece of wood first until you feel like you have it down. I covered the entire chair this way with the stain, making sure I worked in sections and got in all the sanded back areas (the stain is what seals those parts that you’ve sanded back so they don’t continue to chip).
7. Let the stain dry at least overnight before using the furniture. I waited a couple of days before I brought our chairs back in to use.
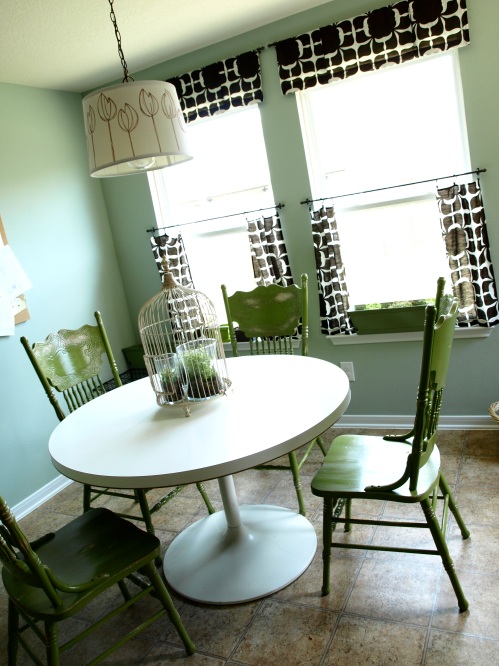
Anyway, thats how I did them. So sorry there are no pics! But heres what they look like now in my kitchen:
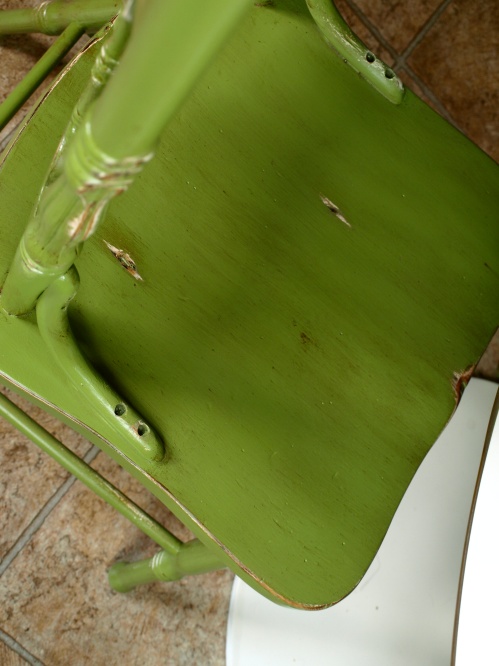
You can see in the pic above how the stain creates variations in the paint color. I love that.
And there they are! I love them and am even more thrilled about the green since I found some awesome green dishes at the DOLLAR STORE last week! I’ll have to take pics of those too because they’re seriously awesome and you’ll never believe they came from the Dollar Store.
P.S. I sold my old table and 2 of the 4 chairs that came with my tulip table and actually ended up making a $10 profit out of the whole deal! Which made my hubby very very happy! 🙂
Anyway, check back soon because I also made a fabulous new light fixture for my kitchen that you’re going to want to see the easy breezy tutorial for! Heres a sneak peek!


