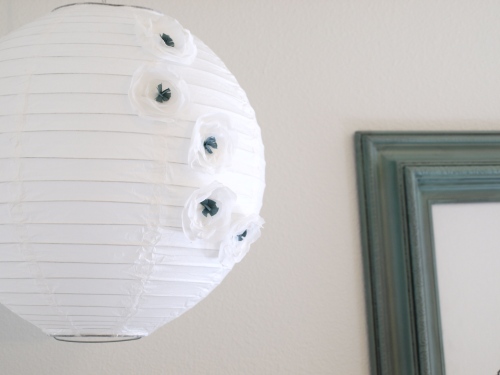
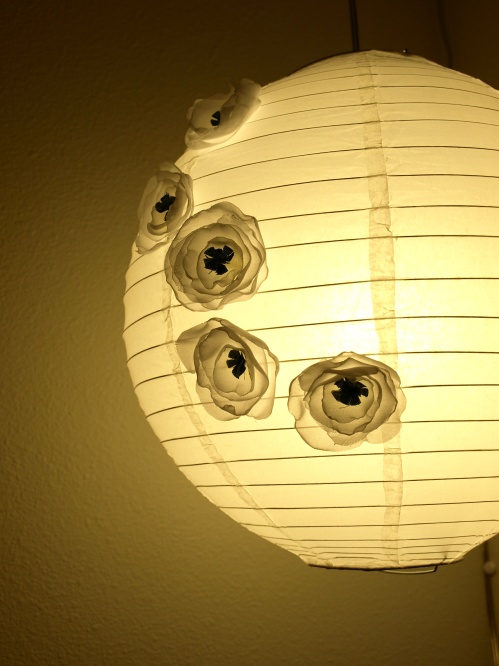
I needed a light over by the daybed in my office/guest room and I really didn’t want to spend a lot so I took a paper round paper lantern that was hanging without a purpose in my son’s room and decided it would do the job. The only problem is it looked so boring, just this white glowing orb against a white wall. I didn’t want to do a lot to it, just a little something to make it more fun. I decided to make a few flowers and attach them to it kind of cascading down one side. I’m pretty pleased with it now. I think it gives just the right amount of pizazz.
This tutorial is really about how to make the singed flowers I used for the lantern. Singed flowers are very easy to make and a quick project that you can create and use for several different purposes. Here are some ideas of ways to use singed fabric flowers:
- Decorate a lamp shade or hanging lantern like I am doing here.
- Make some adorable shoe clips. I found these at StyleHive.com.

- Attach a pin back and use them as a brooch or hang them asymmetrically off a drapey necklace. This one I found at MissPriss.com.

- Or as a flower BIB style necklace like this one by SheersSerendipity on Etsy.

- Make a “never-die” corsage. This one I found at FabulouslyArtsy.com.

- Attach them to a headband, hair clip, or bobby pin. I found this stretchy headband here.

- Make a ribbon belt and attach them to it. This one is from PaperSilkMade on Etsy.

- Attach them to napkin rings for a beautiful springtime place setting. This would also be great at a bridal shower or luncheon and make flowered pony tail holders that are around each napkin to use as a take-home gift after the meal.
- Attach them to a clutch or purse. This one was found by BellaFiore2009 on Etsy.

- Use them as tie backs for drapes to dress up windows.
- Sew them onto pillows. I found this cute little one at HookedonHouses.net.

- Make white ones to attach to a wedding veil. This gorgeous birdcage veil with flower I found at SnowWhiteStudio on Etsy.

So, as you can see, once you learn this little technique you can make countless amazing little doo-dads for you, your home, and all your friends!
So lets get started then:
Cost: $4 for the light kit. The rest I had on hand. The total cost of this project would probably be around $10-$15.
Supplies:
- A paper lantern. Find these at Ikea for about $5.
- A light kit. Also at Ikea for about $4.
- Chiffon, organza, satin, etc. scrap fabric. I used white chiffon that I got out of the remnant bin at Joann’s Fabrics. Basically you want a synthetic light weight fabric that will “melt” a bit under intense heat.
- A needle and thread.
- Something to decorate the center of your flower. I made a little fluffy center out of scrap fabric that coordinated with my room. You can use beads, rhinestones, fabric, buttons, etc to give your flowers centers.
- A glue gun.
- A candle and lighter.
And thats it!
1. Cut your fabric into circles (or petal shapes if you’d like). Cut various sizes from large to small.
2. Light a candle. It is best to use one that is not inside a canister or glass cup. Just so its easy to get close to the flame.
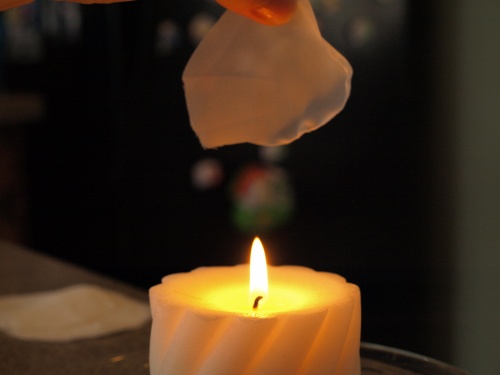
3. Hold an edge of one of the fabric circles several inches from the flame and move in closer (slowly, you don’t want to catch it on fire!) until you see the edge begin to melt a bit and curl.
4. Turn your “petal” to singe all along the edge of the fabric to create a complete “bowl-like” petal.
5. Continue to singe all the fabric circles to create petals in varying sizes.
6. Layer your petals to create a flower. You can layer more or less depending on the size and fullness you’d like. Play around with the petal layout to create different looks or layer them all the same to create uniform looking flowers like the ones I attached to my lantern.
7. Using your needle and thread, attach all the petals together through the center.
8. Depending on what you’re using as a center piece, attach that with the needle and thread. I used a small round piece of blue-green fabric that i frayed and pinched to create a little “tassle” in the center of my flower.
9. Create the rest of your flowers the same way. I made 5 for my paper lantern.
10. Arrange them on your lantern in a way that you’d like and use straight pins to temporarily maintain that layout as you glue them down one by one with a dot of hot glue.
11. Enjoy your fancy new paper lantern!


