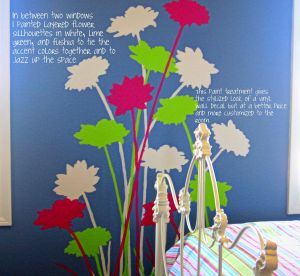
Yay!! I finally did the DIY wall art for my nursery and I’m lovin the way it turned out. I was going for a mod take on baby wall art using some of the fabrics that I’ll be incorporating in the baby bedding and pillows. Heres what it turned out looking like: This is a really easy and adorable art project that takes basically no artistic talent to pull together. Heres the breakdown:
Cost: About $18-$30 depending on what you have on hand.
Supplies:
- Sharp Scizzors that can cut somewhat intricate detail
- Silhouette Images or images with a strong graphic line to them. I knew that I was looking for “woodland creatures” and so looked up “woodland creature clipart” in google images to find my jackalope, owl, and squirrel.
- Canvases either square or rectangular (or oval or round or whatever you’d like!). I got my 3 12″x12″x1″ canvases at BigLots for $5 a piece.
- Fun Coordinating Fabrics. I used 5 different coordinating fabrics mixing prints with solids to make my art a little whimsical. I find most of my fabrics in the “remnant” bins for up to 80% off at fabric and craft stores.
- Adhesive Backed Felt. I got mine at Walmart in white for $0.99 per sheet. It took 3 sheets to make 3 silhouettes.
- Multipurpose Spray Adhesive. I love this stuff and use it a lot. I get the Super 77 spray adhesive at Walmart for $6 a can or so.
- ModPodge.
- Craft Paint (if you’d like to paint the edges of your canvas).
It took me about an hour or so to do all 3 pictures and about another 5 hours to let them dry enough to hang. I can ‘t wait to get the nursery painted so I can see how they look against my light aqua walls! Alright, you got your stuff together? Lets get started.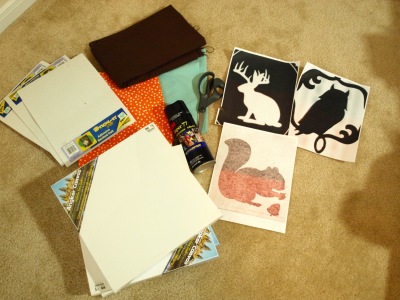
- Find some images you’d like to use for your silhouettes. To do this, simply peruse google images around the category your looking for. For example “woodland animals clipart” was what I typed in to find my 3 images, and they were basically already in silhouette form for me so that was great. If your images aren’t in silhouette form its ok as long as they have a strong line to them that gives the detail you’d like when you make them into silhouette art.
- Print your images off on your home printer in as large a size as needed for your canvas. For my 12″x12″ canvases I basically sized my images to a 3/4 sheet of computer paper to get the size I wanted. This is important because you’re essentially making a stencil to use for your main image in your artwork.
- Cut your images out making sure to acknowledge that your image needs to primarily be one piece to work as a stencil.
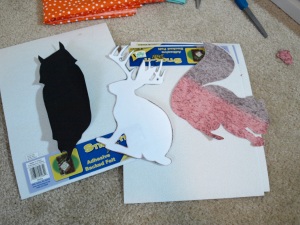
- Next, grab your adhesive backed felt and turn it over to the waxy paper backed side. Using a sharpie (or pen), trace your image onto the back of your felt. I like using adhesive backed felt because it makes it easy to trace and cut, getting crisp edges and all the details.
- Now cut out your images going slowly and using sharp scizzors. DO NOT remove the adhesive backing wax paper before you start cutting. We’ll take that off later.

- Next its time to get creative and pick out your fabrics. This is a lot like scrapbooking in that you want to create a fun backdrop to your main image which is your felt silhouette. You can either do all 3 canvases the same or all different or (like in my case) the middle canvas different while still using coordinating fabrics. I chose a main square of fabric for the backdrop, followed by a strip of coordinating fabric down the center vertically, and then layered my white felt silhouette onto another “outline” fabric. This is up to you. Have fun creating your “fabric scrapbook page” however you’d like! Just don’t get TOO busy with it if you want your main image to stand out.
- Once you have your pieces cut out and have an idea for how you’d like to layer them onto your canvas, (my pieces are totally unkempt looking with crooked lines and frayed edges but you can get more precise if you’d like a more PERFECT look and feel. I wanted to keep mine fun and “handmade” looking so I didn’t worry about cutting everything the exact same), now you can begin gluing them onto your canvas in your desired order.
- To do this, work with the bottom pieces first, spraying moderately the backside of your fabric piece and positioning it onto your canvas. Smooth the bubbles and edges down, and repeat the process with your next pieces. (Hold off on your main image, we’ll get to that in a sec.)
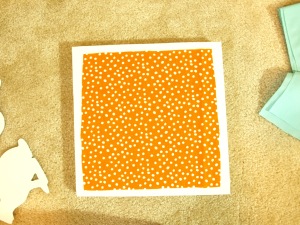

- Once you have that part done, get your silhouette(s) and remove the waxy backing. You can either stick your image directly onto your layered fabric canvas or you can do what I did you give it an “outline” by layering it onto another coordinating fabric.
- If you decide to layer it like I said in the previous step, simply stick it onto your outline fabric and then cut around the image at your desired outline width. I gave mine about 1/4 inch.
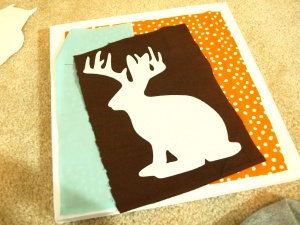

- Next, spray that back of your now outlined silhouette and stick it into place on your canvas.
- If you’d like, you can be done at this point or you can do what I did and finish the whole thing with a generous coat of ModPodge. I like to “seal” my fabric art with ModPodge to make sure that all the pieces aren’t going anywhere and give it a little bit of a gloss. Using a foam brush, apply the ModPodge over the entire canvas covering each layer of fabric.
- If you’d like you can also use craft paint in a coordinating color to paint the sides of your canvas to make it stand out against your wall. I used brown.
And there you have it! Wonderful custom artwork thats easy to make and provides a POP to your decor! What do you think?!  Enjoy making your own fabric wall art and stay tuned for my next tutorial “How to Paint a Mod Wall Mural“!