Feeds:
Posts
Comments

Archive for September, 2011

While at Walmart the other day, I quickly ran through their new-again fabric section.  Can we all collectively say “yay!” for Walmart bringing back the fabric department?!  Anyway, I was about to walk out (I was of course shopping with the boys again and they had already had enough), when I spotted this purple and red chiffon print peeking out of a pile of colorful fleece bolts.  I grabbed it to check it out really quick and loved it even more when I unrolled it a bit and saw the lovely native american-esque pattern.  I know.  I’m sort of becoming obsessed.  It kind of had the same feel as my maxi dress I just did (and LOVE) and when I saw that it was only $1.50 a yard I HAD to have some.  I didn’t know what I was going to do with it, but I got 3 yards and went on my little way.

Well, last night I pulled it out and took a look at it again.  I love the big oversized drapey t-shirts and ponchos I’ve been seeing on Urban Outfitters and Anthropologie and such.  And my new chiffon draped so nicely.  So I drew up a little plan and decided to make a wispy, bohemian, poncho-shirt, or as I like to call it, my shoncho.  🙂

Heres what I did:

Cost: $1.50 (You only need about a yard of fabric for this shirt so check remnant bins to get some great chiffon for CHEAP).

Supplies:

  • About a yard of chiffon fabric (or other lightweight drapey fabric that you love).
  • Scizzors.
  • Pins.
  • Sewing machine.

1.  Refer to my little sketchy plan below.  It basically shows how to do it.

2.  Here are some extra tips.

TIP 1:  BE CAREFUL!  Chiffon is delicate and tears and frays very easily.  So be slow and steady when feeding it through the machine.

TIP 2:  I used the finished edge as the bottom of my shirt so I didn’t have to zigzag the bottom.  If your chiffon piece has a finished edge, utilize it to save you time.

TIP 3:  Don’t forget to zigzag stitch (or serge if you have a serger) the INSIDE seams as well as the outside raw edges so they don’t continue to fray.

And thats it.  This took me less than 30 minutes to throw together.  And I’m pretty happy with it.  🙂  What do you think?  You can make this.  And its great for FAT days.

P.S.  I also made the red necklace and the pink clip-in hair extension.  For more of my jewelry and accessories, see the Fashion Tutorials section on the sidebar. 🙂

Read Full Post »

So I was staring at a pair of cream colored flats I bought at Target on clearance a while back for $5 thinking about how I have never worn them and wondering if I should donate them.  I’d hate to donate them.  They are seriously brand new.  And super cute and unique.  Then why don’t I wear them?  Hmmm…..  I looked around at my other shoes.  I have bright yellow heels, hot pink flats, teal espadrilles,…duh.  I don’t wear them because they’re boring!  Plain old creamy-nude.  Well then, I’ll just have to change that.  So I got online in search of a way to jazz up my boring little flats.  Thats when I discovered that you can actually SPRAY PAINT shoes.  And people had.  And it was awesome.

Having an abundance of spray paint in my garage, I got excited, grabbed my shoes, and headed out there to find the perfect color.  I picked a can of corally-salmon spray paint I had gotten at the Dollar Store months ago.  I LOVE coral lately and coral paint would be just the punch those shoes needed.  So heres what I did.

Cost:  $6 (thats for my shoes and the paint)  this of course will vary.

Supplies:  

  • A pair of shoes.  *TIP* Patent leather or faux patent leather (basically anything shiny) will probably not hold the paint as well and may end up cracking.  I recommend only painting shoes that are a faux suede-ish material (like mine), cotton-ish material, or satin.  That way the paint seeps into the fibers and doesn’t become super stiff and chip off.
  • Paper towels, rags, etc.  To stuff your shoes so the paint doesn’t get inside.
  • Tape.  If you want to tape off the sole and heel so that it stays the original color.
  • Spray primer.  (Recommended but may not be absolutely necessary)
  • A razor blade.  To take any over-spray off of the heel or sole.

1.  Stuff your shoes with rags/paper towels.  Make sure that any are you don’t want paint on is covered by towels or tape.

2.  Prime your shoes with a spray primer if you’d like before you paint them and let that dry.

3.  Spray paint shoes in sheer coats to avoid drips or puddles.  Spray on an even sheer coat, let dry, then spray on another, etc, until the shoes are completely covered in an even coat of paint.

4.  Let dry overnight before you wear them.

5.  Remove tape and rags and take off any over-spray by carefully scraping it with a razor blade (or fingernail).

6.  Enjoy your new shoes! 🙂

Read Full Post »

OK!!  This is it for jewelry for a while I promise….well, actually I’d better not make that promise, but its the rest of what I’ve done lately so far.  🙂

First there are these rust color earrings I made for fall.

Then, there are these cute little clay rose earrings.  Heres the tutorial…

I also made these vintage inspired rockabilly-ish cherry drop earrings.

I made these ones below to go with my new diy’d maxi dress.

These ones were inspired by these that I found on Pinterest:

I loved the colors and that inspired me to make mine below:

I also wanted to whip out my feathers and make myself another pair of long feather earrings.   I made these out of mustard colored leather and wooden beads and various feathers.

Since I had my feathers out already, I decided to make myself so long feather hair clips as well.  The one below is super eclectic and bohemian for big beachy long hair and a tan.  (Two things I don’t have…oh well.)

This one I made as an alternative to dying a streak of my hair hot pink.  🙂

Now here are a slew of rings I made as well.

Phew!! Are you sick of my jewelry yet?  Haha!  Anyway, if there is anything in particular that you’ve seen that you’d like me to A. Make for you (I can take some orders I spose), or B.  Teach you how to make (if I haven’t already done a tutorial on it), let me know!  Hope you enjoyed all this crafting craziness!  More fun projects to come.

Read Full Post »

I made a bunch of singed flower petals (go to this tutorial to learn how) a while ago that I was meaning to make into flowers for different things.  I never got around to assembling them into anything until I found them lying haphazardly in one of my craft bins the other day.  I love bright red poppies and decided to use the red petals I’d made by singeing chiffon circles into little poppy shoe clips.  I’ve been wanting to make shoe clips for a while now and have been keeping my eyes open for shoe clip findings at the craft stores.  Unfortunately, no one around here sells any “shoe clips” and I was too impatient to order some online (you can find them in the supply section on Etsy), so I opted for a bag of clip on earring backs instead (they’re basically the same thing) that I found in the craft section of the fabric store when I got my fabric for my maxi dress the other day.  Since I already had the petals made in a bunch of various sizes, all I had to do was stack them and stitch them together.  Then I sewed 3 black beads in each of the centers.  Too cute if I can say so myself.

Once they’re assembled like this all I did was cut out two small circles of red felt and attach the clip on back to the back of the flower with glue.

And voila!  Cute, quick, and easy!

I love them clipped on to my thrifted zebra flats!

The other great thing about using clip on earring backs is that these same shoe clips can easily be clipped on to a ribbon belt, necklace, or if you made some smaller ones, even YOUR EARS!  Fun fun fun.

Anyway, hope you’re getting inspired by all this crazy craft mania!  GO DO IT!  If I can YOU can! 🙂

Read Full Post »

Continued from yesterdays post, I thought I’d show you the rest of the jewelry I’ve made recently…

I made this loverly little number just from my own little brain.  I needed something with purple and I love the natural cut and polished stone pieces with the deep purple teardrops.

This next one I was inspired to make when I saw this outfit by Kendi Everyday:

I happen to have a pair of broken earrings lying around that I reconstructed into this:  (Not quite like Kendi’s but still gives the same feel.)

I made this one with a little flower I ripped off a cheap pair of shoes I never wore.  I’m LOVING grey and gold.

And another grey and gold number…  To make the clay roses see this tutorial.

I found this fushia stone at Walmart in the craft section and love it on a simple rustic brass chain.

I wanted something in a coral color that was light and feminine and so I came up with this multi-strand beauty.

I also made this necklace with an Antropologie-esque feel.  Nothing in particular inspired this design, but I love how the flower turned out and the pop of red with the softer jades and limes.

Ok.  Have you had enough?  I hope not cuz I haven’t even shown you the rings and earrings I made!  Maybe tomorrow…

🙂

Read Full Post »

My poor dining room table has been attacked.  Beads, findings, feathers, fabric...you can’t even see the table top anymore.  Honestly, I wish I could leave it like this all the time.  I’m so much more productive when all my gear is just stroon (is stroon a word?) about, standing at ready for me to dive in and make something whenever I get a spare minute or two.  We barely ever use the dining room and its got the perfect amount of table room and great window light for me to work on all my little jewelry bits.  My hubby complains though.  I have a craft room for crafts he says.  Hes right I guess, although really there isn’t enough light or table space in my craft room to get stuff done.  Its like I need a room to store all of my craft stuff, and another to make it all.  Actually, if I’m being honest, the perfect house for me would consist of like 6 “work” rooms.  An office for blogging, a jewelry making room with a giant table and rows of beads and findings, an art room, an interior design studio, a photography studio, and a recording studio (that ones just a bonus, my hubby always wants me to record my songs and stuff for him and I never do).  Maybe someday… maybe someday I’ll pair down on my hobbies!  Yeah right! 🙂  Anyway, in the meantime, the dining table will do, as long as I get her cleaned up every once and a while to please Mr. HunnyBuns.

Anyway, unfortunately for my hubby and our table, I’ve been up to quite a lot this past week or so.  I’ve been having a blast making jewelry nonstop whenever the kids go down or while they’re playing by themselves.

Here are all the things I’ve made:

The necklace below was inspired by this design that I saw on Pinterest:

And heres mine, made out of an old t-shirt and wooden beads:

And heres a great tutorial on knotted fabric beading if you want to make your own.

I also saw this necklace on Anthropologie and was inspired to make my green and gray knot necklace below.

And here is my necklace using a similar technique.  I used prestrung seed beads from Walmart’s craft section so it made it super quick and easy to loop them together and attach the chain to the ends.  The little jewel is just a clip on earring I move around from necklace to necklace when I wanna glam it up.

I saw this on Urban Outfitters and was inspired to make my teal feather necklace below.

Heres mine.  I made mine a bit different but I LIKE MINE BETTER. 😉

I also saw this tutorial on Pinterest and made a jersey necklace like it from an old shirt and wooden beads.

Heres mine:

Thats all I have time to show you right now!  But come back soon!  I have TONS more! 🙂

Read Full Post »

I’ve suddenly become obsessed with making clothes.  I blame it on Pinterest and all the adorable ideas I’ve been exposed to.  In one of my lives (lets pretend we get lots) I would love to be a fashion designer.  *Sigh*  Instead though, I have been breaking out my sewing machine and pretending I’m one.

Don’t get me wrong though.  I seriously am NOT a seamstress.  I know very little about sewing actually and I never follow patterns.  I don’t know if I even know how to read patterns.  I just sketch ideas out as they come or try to figure out how to make things based on other items I’m inspired by.  This is why my little sewing tutorials are relatively easy.  Because I don’t think I could pull of anything much harder.

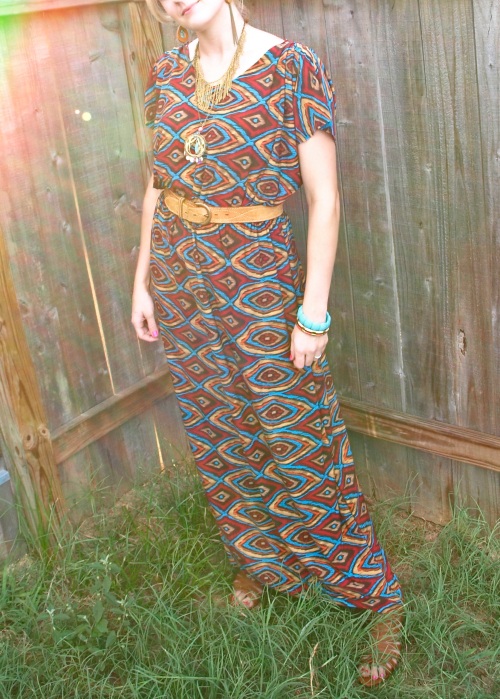
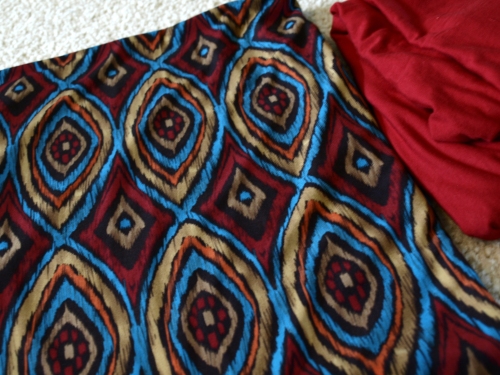
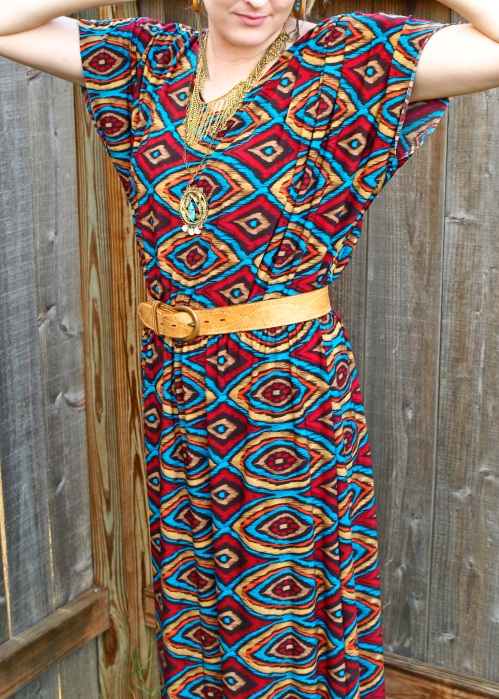
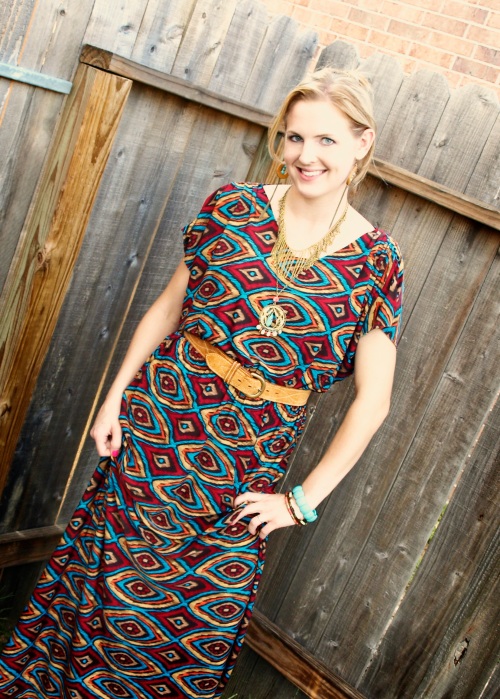
When I do get the itch to sew something, I usually turn to jersey fabric or a stretchy knit.  This stuff is so easy to work with and doesn’t fray so hemming edges isn’t necessary unless you want it to be.  I went to the fabric store the other day in search of a fun print in a knit to make a maxi dress after becoming obsessed with the kimono style maxi dresses I’d seen on Pinterest and Etsy lately.  I took both my boys, and quickly perused the options in between shoving cookies into my screaming 14 month old and reprimanding my 4 year old for unrolling bolts of fabric down the aisle.  Ugh.  Can I just say how much I HATE shopping with my kids.  By the way, any tips on that matter would be appreciated!  Anyway, I found this colorful, kind of native american-esqu, ikat-ish print that I loved and lucky for me was 40% off.  I got 3 yards for $23.  Enough to make my maxi dress and a little whatever-else-I-feel-like-making later.  Anyway, this is a really easy dress and I’m pretty happy with how it turned out!  Hope you like it and have fun making your own!

Cost:  About $23 or so depending on the fabric

Supplies:

  • 2 and a half yards or so of stretchy knit fabric
  • Coordinating thread.
  • Elastic for waistline.
  • Pins.
  • Sewing machine.
  • Scizzors.

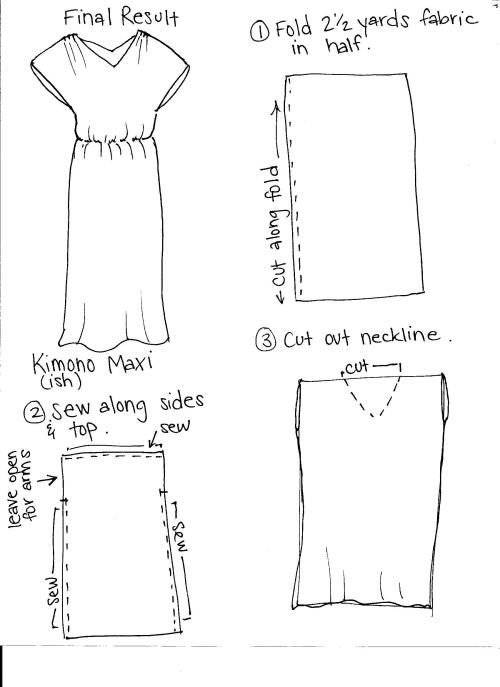
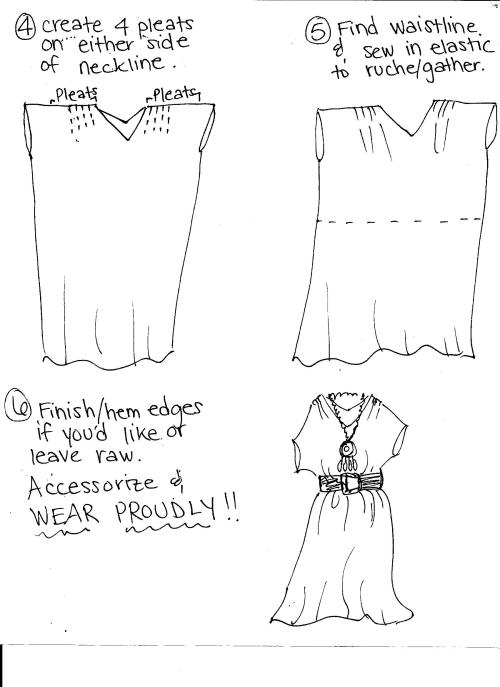
1.  Refer to my little sloppy sketches below that kind of walk you through it.

2.  The sketches pretty much lay it out for you but I’ll give you some extra tips.

  • TIP 1:  Try this on a lot as you go to make sure its fitting you well.  OR, take a maxi or long dress you already own and find the proper length for your new dress from that.
  • TIP 2:  Leave at least 12 inches open at the armholes when you sew up the sides, if you want less of an opening, you can always sew up more of the armhole after you try it on.  P.S.  When sewing, sew right sides together and use a knit stitch (or zigzag stitch) on your machine to allow the fabric to continue to stretch.  Careful not to pull the fabric as you are sewing to avoid rippling.
  • TIP 3:  Cut the neckline by folding the dress in half and cutting a half V on the fold.  This way the neckline will be symmetrical.  Also, cut the neckline pretty conservatively at first.  Since the fabric has stretch it will widen/deepen when you put it on.  You can always cut more from the neckline after you try it on and gauge how deep/wide you’d like it to be.
  • TIP 4:  You can omit the pleating if you’d like along the shoulder area at the neckline.  I just through that on mine for solely decorative reasons.  If you don’t know how to make a pleat, google it.  Its super easy and quickly adds a little “fancy” to any design.
  • TIP 5:  Cut a strip of elastic long enough to wrap around your waistline.  Make it slightly longer than you think you’ll need.  You can always cut the excess off when you’ve sewn it into your dress.  Refer to this post for more tips on sewing in elastic waistlines.

3.  Throw it on when you’re done and accessorize in an oh-so-bohemian-chic kind of way and be proud of your work!

GO DO IT!!  🙂

Read Full Post »

Wow!  I am SUPER excited and flattered this morning!  The AMAZING home decorating site Apartment Therapy has just featured my DIY Plastic Placemat Chandelier!  All I can say is THANKS A BILLION!  Wow! 🙂

Read Full Post »

I have been crafting like crazy lately, and my house shows it.  There are fabrics, beads, dyes, and odds and ends EVERYWHERE.  I LOVE IT.  It means I’ve done something.  It also means I have one RIDICULOUSLY huge mess to clean up.

Every once in a while I’ll hit a huge surge of creative juices.  Maybe I’m manic.  Or just A.D.D.  Probably both…  ANYWAY, I hit one of these surges around the middle of last week and have been having quite some fun indulging my crafty side.  I feel quite productive.

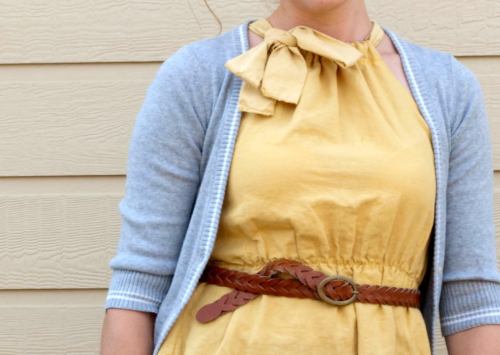
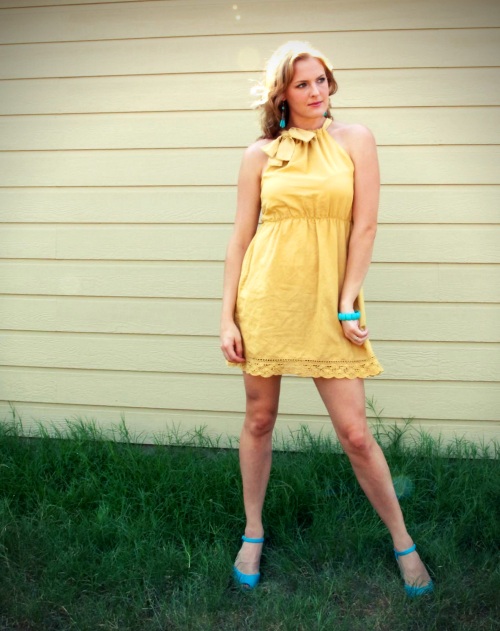
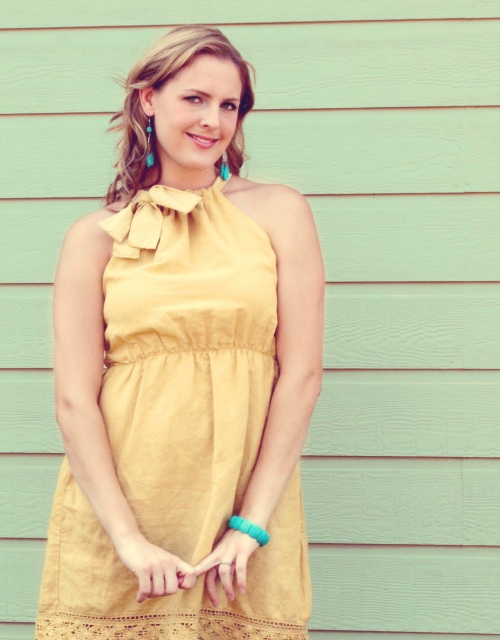
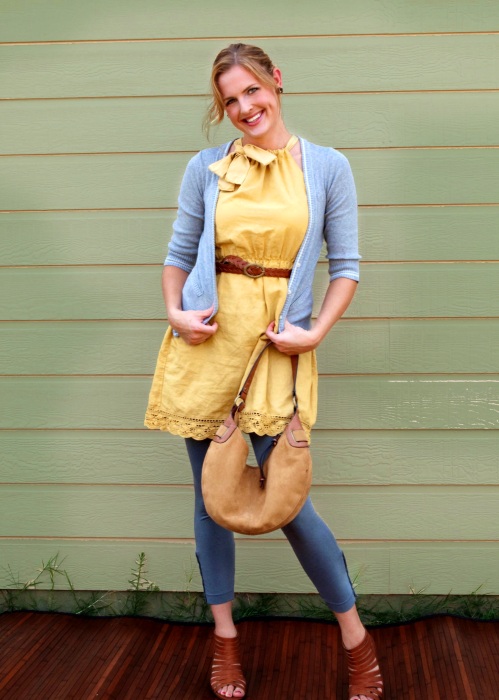
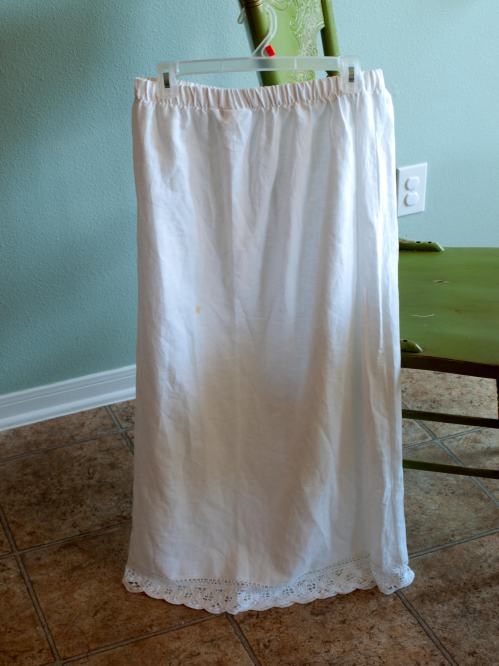
Probably my most favorite thing I made this past week was this little mustard number I refashioned from a frumpy long white skirt that I got as a gift a while back and NEVER wore.  Not even once.  I’ve been addicted to this site I found recently called Weardrobe and have been in love with all the mustard yellows I’ve been seeing in the fashion world.  So, I went into my closet, in an attempt to create me something MUSTARD.  I saw the skirt and thought, “Hmmm.  I’m sure I can do something with this”.  And I did.  And I love it.

Heres a look at it before:
Heres what I did.

Cost:  About $6  (for the dye)

Supplies:

  • A long skirt.  Preferably pretty straight.
  • Sewing machine.
  • Elastic
  • A long piece of scrap fabric (for the necktie).
  • Brown and yellow RIT dye.  (Find it in the laundry detergent section at Walmart).  I used the liquid kind.
  • Sewing machine.
  • Thread.
  • Scizzors, pins, etc.
Okay!  This is really super easy and I know you’re dying to make it so here are the instructions! 🙂
1.  Refer to my little diagram below.  Sorry, I know its kind of dark.
2.  Basically, you just want to fold your skirt in half and cut off the waistline (mine was elastic) and then cut from the waistline down to the side to create armholes.  Its worth it to throw it on after you cut off the waistline and get a feel for how wide you want your neckline and how large to make your armholes.  Another way to do it is use a tank top you already have as a guide, although you may still need to adjust it a bit.  Make the neckline area a little wider than you would like.  It will be gathered by the necktie in the end.
3.  Next you want to hem all your raw edges you’ve just created.  I don’t own a serger (dangit) so I just zigzag stitched the edges and then folded them under and straight stitched (on the armholes only) about a quarter inch.
4.  The next thing you’ll do it create a pocket at the neckline for the sash/necktie/whatever-you-call-it to go through.  Just fold under about 2 inches or so and straight stitch the bottom of the fold.  *TIP* Be aware of the fabric that you’re working with.  You might need to zigzag stitch the whole thing if you’re working with stretchy fabric.  Mine was linen.
5.  Now you need to make the necktie with your scrap fabric.  I had a cut up old white sheet I used.  I simply made a long sash by cutting out about a 5 inch wide strip and then folded it in half (right sides together) and stitching it together along the edge.   Then I turned it right side out and stitched up the ends.  Then feed it through the neckline pocket you made with both ends coming off to one side in the front.  *TIP*  Use a large safety pin attached to the end of your necktie to feed it through the pocket easily.
6.  Now, put on your dress.  It will look kinda like you’re wearing a potato sack with a cute little bow.  Find where you’d like to create a “waist”  and pin that area on each side.
7.  Next, take it off, and mark with straight pins (or a fabric chalk) straight across to the other pin to make a straight waistline guide.
8.  Next, wrap a long piece of elastic around your waist at the same area wear you pinned on your dress.  Find the size/tension that you like and cut the elastic to that size.
9.  Now, sew the elastic onto your dress following the waistline guide you’ve created (turn the dress inside out again and sew the elastic on the inside of the dress).  To sew elastic so that it gathers the fabric (also known as ruching), start off by tacking the elastic down (preferably on a side seam) and then pull on the elastic to stretch it a bit as you slowly stitch it to the fabric.  Practice on scraps first if you have never done this before.  You’ll get the hang of it.  Try to keep the same amount of tension on the elastic through the entire waistline so that it gathers evenly.
AND THATS IT!!  You’ve done it!
Now just follow the dye instructions (if you ARE dyeing) to create a new custom color.  For my mustard yellow color I mixed about 1/4 the bottle of brown dye in with the full bottle of yellow dye and then added it to steaming hot water (about 3 gallons).  It took very little time (about 15 minutes) for my skirt to reach the color I wanted.  Then I simply rinsed it out in cold water and laundered it as usual.
What do you think?  Easy right!?  I’m IN LOVE.
Since its a billion and one degrees here you could still wear it like this:
I love the yellow with the pops of teal for summer.
Or, when it starts cooling down, wear it like this:

Mustard yellow, grey, and pecan.  Yummy.
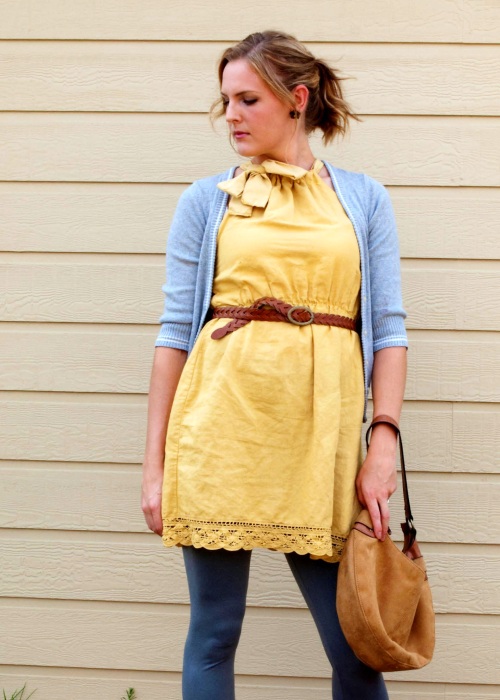
Heres the BEFORE and AFTER again:

Read Full Post »